Inviting Users to an Organisation
As an Admin of an organisation, you can invite new team members directly from the Users tab on the Organisation page. Each invitee gets an email with sign-up instructions, and once they set a password they land inside the organisation with the role you assigned.
You can also invite people with narrower access — a Location Manager who only sees one location, or a Room Manager scoped to a single room.
Roles
BMR has three roles you can grant when inviting a user:
| Role | Scope | What they can do |
|---|---|---|
| Admin | Whole organisation | Full access — manage all locations and rooms, invite and remove users, edit organisation settings. |
| Location Manager | A specific location | Manage the rooms and data inside that single location. Cannot invite users or edit the wider organisation. |
| Room Manager | A specific room | Work on that single room — scans, markers, measurements, and designs. Cannot invite users or manage other rooms. |
Pick the narrowest role that fits — it keeps each person focused on the spaces they are responsible for and reduces accidental changes elsewhere.
How to invite someone
1. Open the Organisation page and go to the Users tab
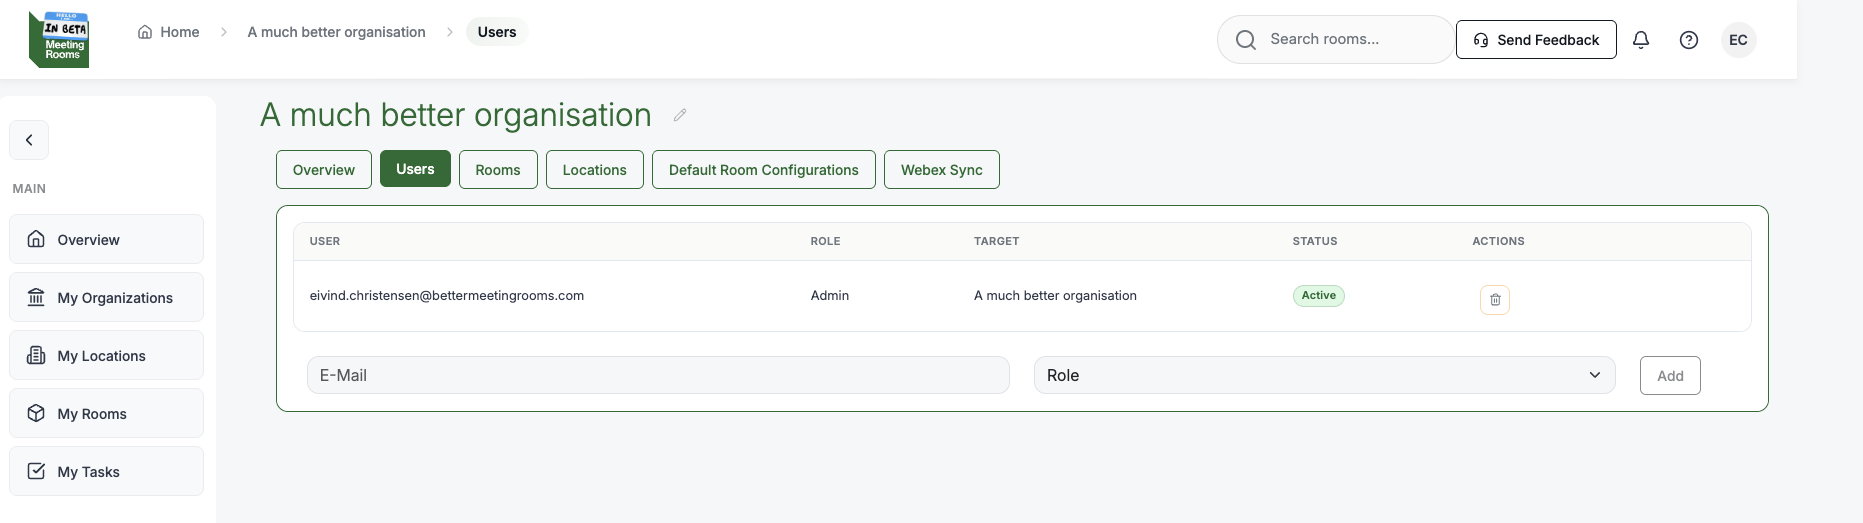
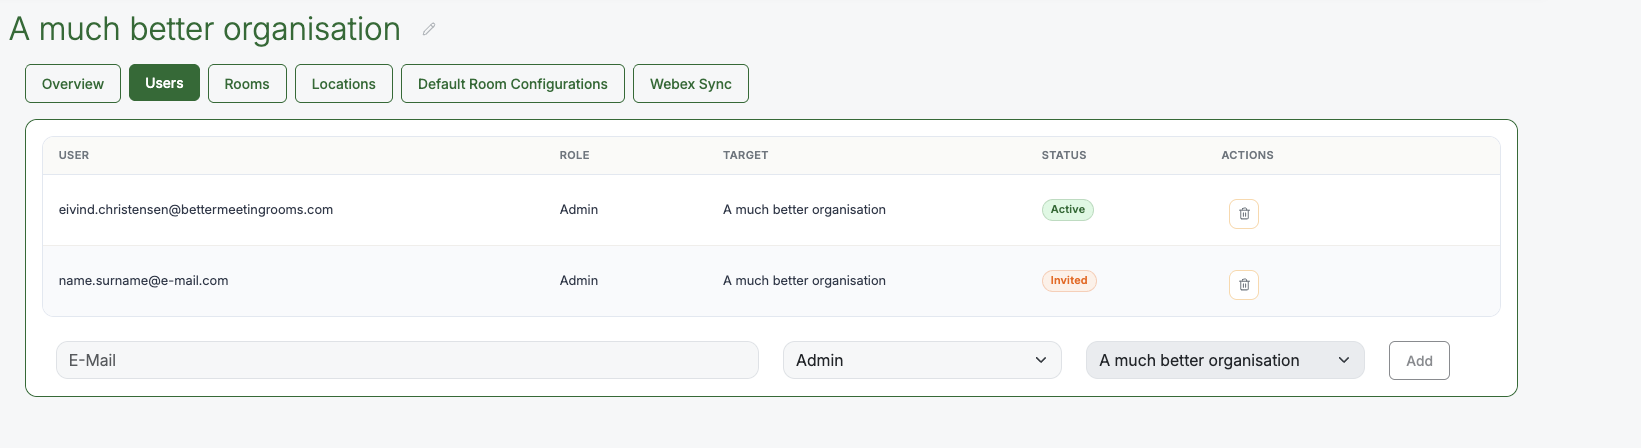
From the Web platform, open the organisation you want to invite the user into and click the Users tab. You will see everyone who already has access, their role, their target (org / location / room), and whether they are Active or still Invited.
2. Enter the email and pick a role
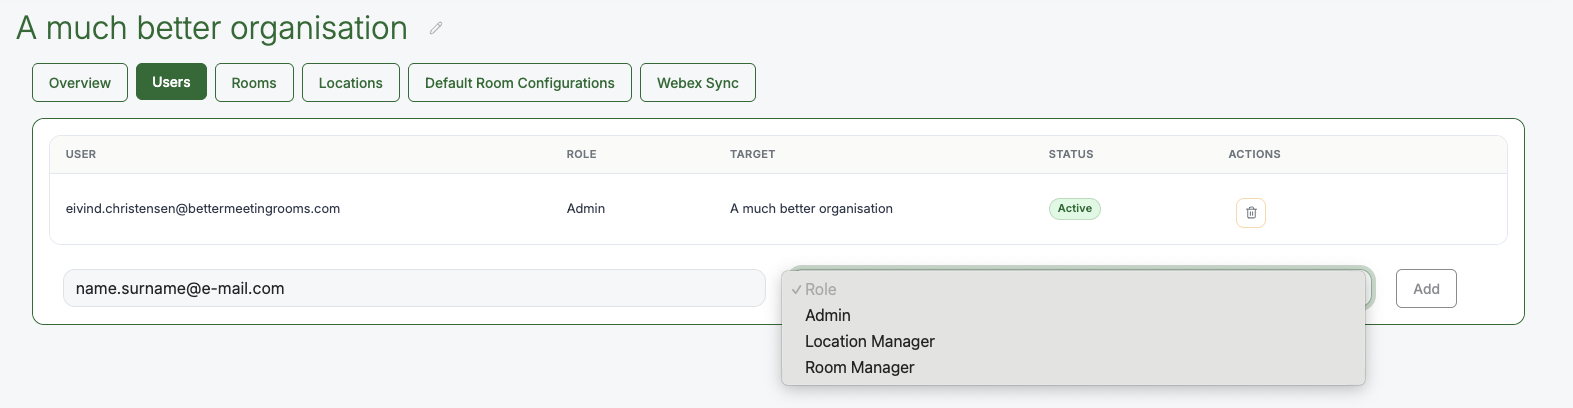
In the row at the bottom of the users table, type the invitee's email address, then open the Role dropdown and choose Admin, Location Manager, or Room Manager.
3. Choose the target
Once you pick a role, a target dropdown appears next to it. The target depends on the role:
- Admin — the target is the current organisation.
- Location Manager — pick which location the invitee should manage.
- Room Manager — pick which room the invitee should manage.
Select the target and click Add.

4. Confirm the email address
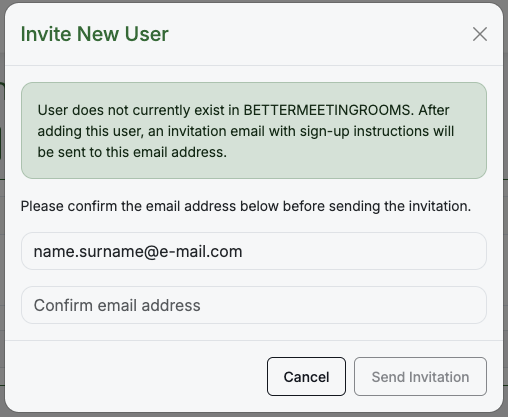
An Invite New User dialog opens. It reminds you that the user does not yet exist in BETTERMEETINGROOMS, and that an invitation email will be sent to the address you provided.
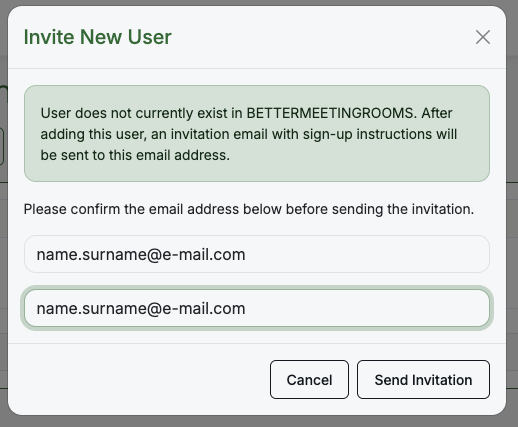
Type the address a second time in the Confirm email address field. The Send Invitation button stays disabled until both entries match — this is a deliberate safety net against typos in the invited address.
5. Send the invitation
Click Send Invitation. The dialog closes and the new user appears in the Users table with status Invited (orange). They will move to Active (green) as soon as they finish signing up.
The invitation is bound to the exact email address you enter. If the invitee signs up with a different address (say, firstname.lastname@ vs firstname@) they will end up in a separate account and will not see the same rooms and data as the rest of the organisation. Confirm the address is correct — including the domain — before sending.
What the invitee sees
The invitee receives an email from BMR with a sign-up link. Opening the link takes them to the Welcome screen where they set a password. Once done, they can log in via BMR Mobile or the Web and will see the organisation, location, or room they were invited to.
For the invitee's side of the flow, see Account Setup.
Users can also sign up without an invitation and create their own Organisation, Location, and Room through a guided onboarding wizard. Inviting them into your organisation is still the right choice when you want them working in your existing workspace — see Signing up without an invitation for the self-serve path.
Managing existing users
The Users table also lets you review and remove access:
- Status — Active (green) means the user has completed sign-up; Invited (orange) means the invitation is still pending.
- Remove — the bin icon in the Actions column revokes a user's access. For users still in Invited state this cancels the invitation; for Active users it removes them from the organisation.
Adding the same email again later will send a fresh invitation.