Design Phase
The Design Phase turns a room into a complete, validated setup. You can create a design on the web or design in AR on your phone — either way it lands in the room's Designs, ready to refine, version, and approve in BMR Studio.
- Choose a method — BMR Studio (recommended) or VRC (Workspace Designer)
- Base it on a Scan, an Existing Design, or a Custom Room
- Built and refined in BMR Studio
- Place equipment in the real room on iPhone or iPad
- Requires a room scan first
- Imported into BMR Studio to finish
Creating a design on the web
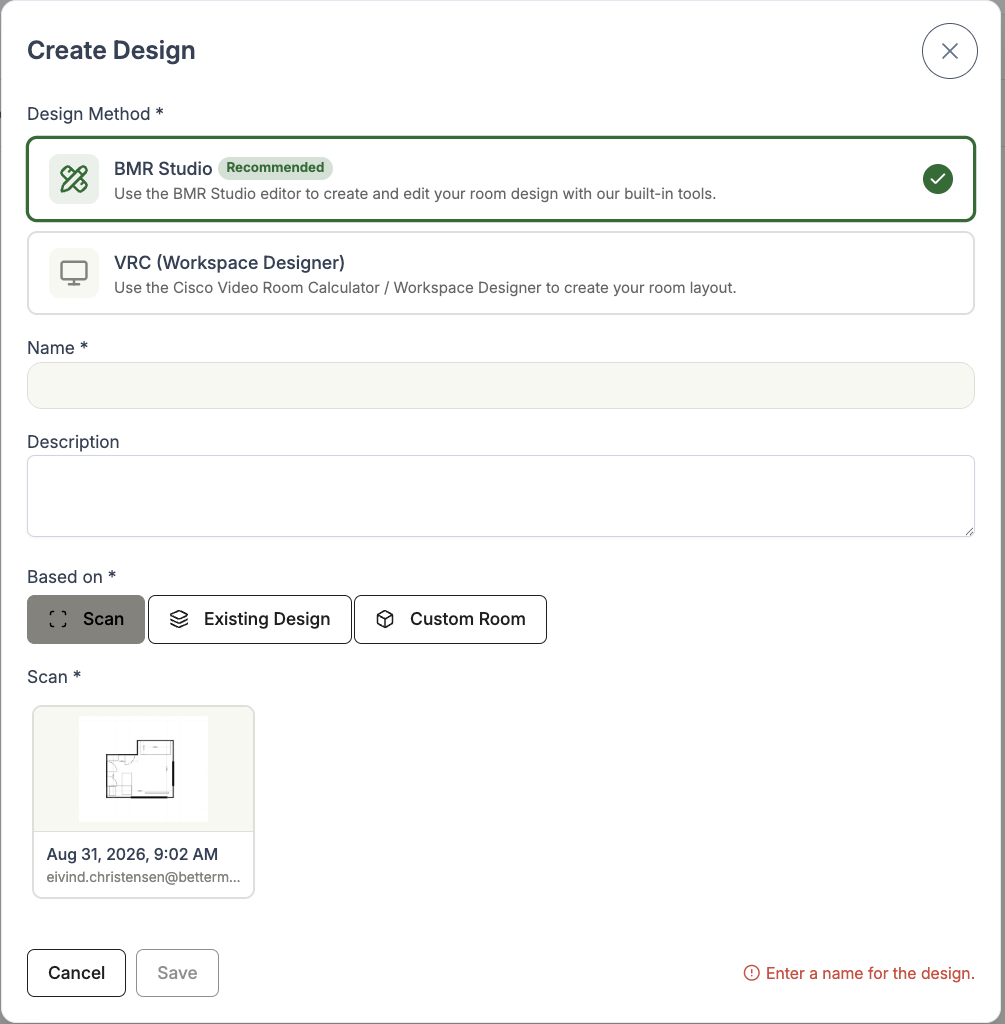
When you add a design on the web, the Create Design dialog asks for two choices:
Design method
- BMR Studio (recommended) — create and edit the design in BMR Studio's built-in 3D editor.
- VRC (Workspace Designer) — use Cisco's Video Room Calculator / Workspace Designer to create the room layout.
Based on — what the design starts from:
- Scan — an existing room scan, for an accurate model of the real space.
- Existing Design — start from a copy of another design for the room.
- Custom Room — a blank room you size yourself, when there is no scan yet.
Add a Name (required) and an optional Description, then Save.
BMR Studio
The unified 3D workspace for all room design work.
BMR Studio is best used on the web, on a computer — the large screen and precise pointer make detailed design far easier. It also runs on iPad, though that isn't recommended for serious design work, and it is not optimised for iPhone.
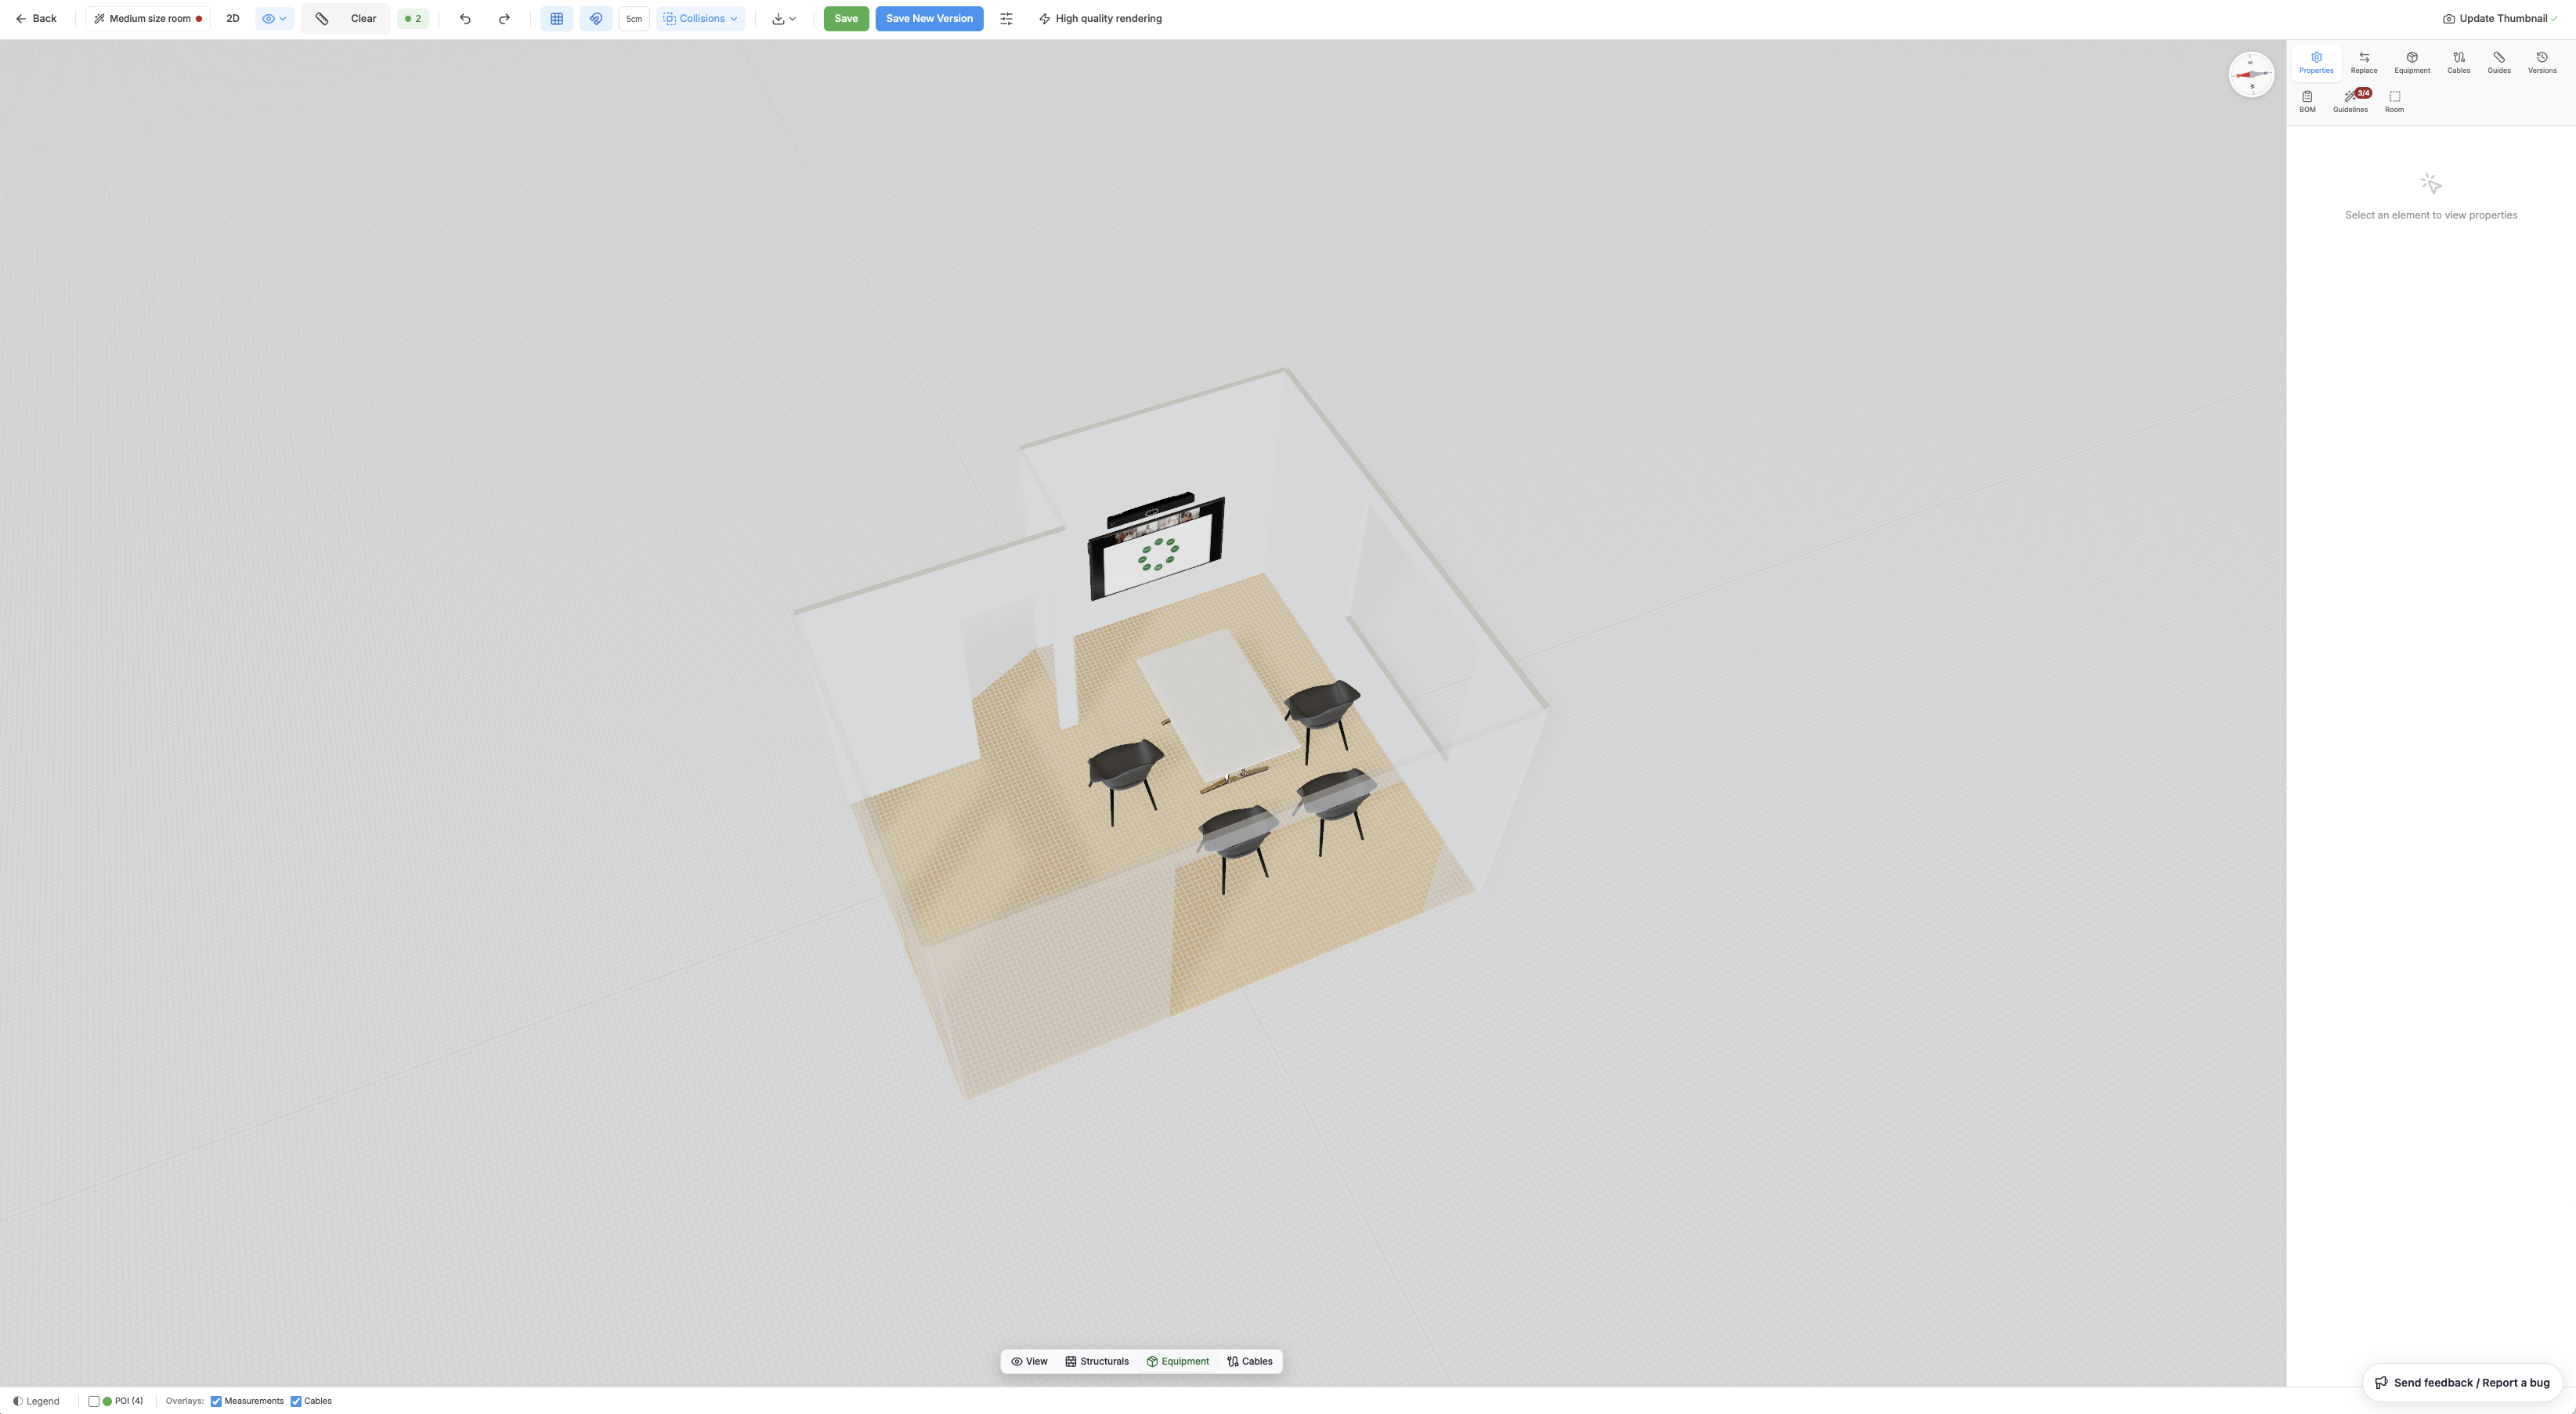
BMR Studio uses dedicated modes — View, Structurals, Equipment, and Cables — so you can focus on one thing at a time. Place equipment from the catalog, adjust room structure, plan cable routing, create multiple design versions, and mark the final design as Active.
Read the full BMR Studio guide →
AR Design
Place equipment directly into the physical room using augmented reality on your iPhone or iPad. Items are positioned at real scale in the actual space, and the result is saved as a design that you can continue refining in BMR Studio.
AR Design requires a room scan first — the scan provides the coordinate space that links AR-placed items to the room model. Once uploaded, the AR Design is imported into BMR Studio, appearing alongside your Studio designs so you can refine, version, and finish it there.
Read the full AR Design guide →
Catalog
Both design tools draw from the Equipment Catalog — the shared library of items you place in a room, each with a 3D model and rich metadata. The catalog now has its own section covering what it stores and the 3D model standards behind it.
Outputs of the Design Phase
- An approved design with a complete equipment list
- Coverage visuals — camera view, screen visibility, audio coverage
- Acoustic recommendation based on measurements and use case
- A full version history tied to the room
Prerequisites
- ✅ Completed scan and markers — Room Data ready
- ✅ Acoustic measurement uploaded (strongly recommended)
The better the Room Data, the faster the Design — and the fewer revisions needed.